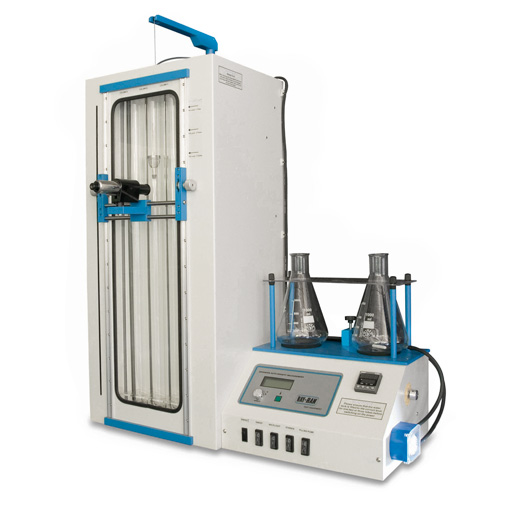
Auto Density Column
Quick and accurate density measurement
The Advanced Auto Density Gradient Apparatus from Ray-Ran has become the world’s benchmark for accurate density measurement of small solid specimens using the column method.
Built with operator simplicity in mind, its ease of operation and high accuracy makes it ideal for density testing during product development and quality control within production, research and development labs and teaching institutions.
Built in temperature control
Our Auto Density Measurement apparatus is supplied with built in digital temperature control to ensure the temperature of each column is at 23°C+/- 0.1°C. For ambient temperatures in excess of 23°C the integrated cooling coil can be used in conjunction with an optional water chiller unit so the correct temperature can be maintained. This can be even more accurately controlled using the optional microprocessor-controlled water flow valve kit.
How to use the density measurement system
Available as a 3 or 6 column version, the built-in on-board Microprocessor System accurately calculates the specimen’s density to a resolution of 0.001g/ml more quickly and more accurately by measuring the samples position in the column relative to the calibrated marker floats. Once the correct position of the sample is recorded, the density is displayed on the LCD screen. Column linearity can also be checked and shown in Techni-Test software.
The gradient column method
Density gradient columns are a way of determining the density measurement of polymers, resins, plastics and more.
Building a column
To build a column, a peristaltic pumped filling system is supplied with the Advanced Auto Density Gradient Apparatus from Ray-Ran Column filling speeds are variable from 0.5l/hr to 1.5l/hr.
The resulting solution has a density which, when introduced into the column, increases uniformly from top to bottom. Calibrated glass marker floats with known densities are introduced into the column and sink to a point where their density matches the solution.
Microscopic sighting
A linear encoder which is attached to a trammel guide is used to calibrate the gradient of the column by focusing the optical microscope onto the center of the calibrated float and entering the floats density value into the microprocessor. Once test samples have been introduced into the column and have reached a point of static equilibrium, they are accurately sighted using the microscope.
The resultant density of the sample is obtained and displayed on the LCD without the need for complicated graphs. An automatic sweep mechanism is used to extract the floats and samples from each column.
Data analysis with Techni-Test software
The on-board LCD provides simple on-screen instruction and using the alpha/numeric keypad test parameters, such as operator list, material reference numbers and batch numbers, can be entered and stored for results presentation. Batch statistics of mean, standard deviation and co-efficient of variation are automatically updated after each test and results are shown in graphical and tabular format for analysis when downloaded to the supplied Techni-Test PC software.
Optional Ancillaries:
Glass marker floats 0.7g/ml up to 2.2g/ml
Microprocessor controlled filling system
Digitally controlled water chiller
Basic manual water chiller unit
FEATURES
- Techni-Test Software for data analysis
- Automatic density calculation
- Automatic calibration system
- LCD display with backlight
- Variable speed pumped filling system
- Twin conical filling flasks
- Automatic magnetic stirrer
- Automatic sweep mechanism
- Stainless steel sweep baskets
- 7x optical microscope
- Digital temperature control to 0.1°C
- Mini USB
- Cooling coil
- 110v 60hz and 240v 50Hz
- Traceable calibration certificate
- CE declaration certificate
- 1 year return to base warranty
PRODUCT SPECIFICATIONS
SKU: RR/DGA
Applications: Density Testing
Materials: Elastomers, Film
Weight (3 column): 70 kg
Weight (6 column): 80 kg
Dimensions (3 column): 850x400x1110 mm (WxDxH)
Dimesnions (6 column): 1200x400x1110 mm (WxDxH)
Power: 110-240VAC, 50-60hz
Display: 160 x 128 dots graphic LCD module with alphanumeric keypad

